Введение

  1. UpyRTLmEF1uIc4Qx
    UpyRTLmEF1uIc4Qx
    cDd1YPYKMoXR1C3a
    VZ3GNbKqWGshHBW3
    • To remove the battery cover push it with two thumbs away from the device.

  2. tOQnmHDcehJDDemd
    • Though it's possible to remove the battery without tools it is very difficult and will likely result in splitting your nails

    • Use a toothpick or spudger to remove the battery.

  3. UxuBG1uTAxiCLvNZ
    UxuBG1uTAxiCLvNZ
    IXI6NGHMXT6gnDKS
    DNEA64m4LiW3hJcX
    • Unscrew the 4 TR5 Torx screws. Two of which have warranty void stickers.

    • Open the clamshell and insert an opening pick via the bottom corners.

    • Pry around the sides of the device with an opening pick.

    • The areas by the hinge are harder to remove. Take your time and go slowly.

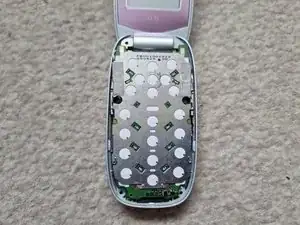
    • Unclip the one half of the top side and then it should be safe to lift the button membranes out.

  4. uv2CpJXWF3ctoc3e
    uv2CpJXWF3ctoc3e
    eDXdamgSuTakmaIs
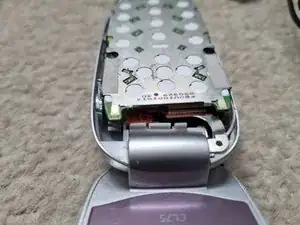
    • Remove the one TR5 Torx screw holding the hinge and cables in place.

    • The screw is smaller than the other screws do not mix them up.

    • Do not remove the motherboard as it's still connected.

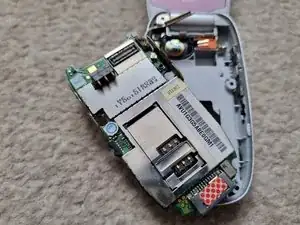
    • The screen is connected via a ribbon cable underneath the board. Remove it with a spudger.

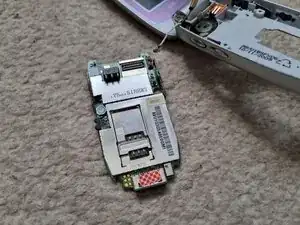
    • Lift the board out, turn it around and place it on the left of the frame.

    • The antenna is still connected. Do not break it.

  5. 5lnaIDYhDKAhlC4T
    5lnaIDYhDKAhlC4T
    ECKRssX6MXXhZDhO
    • Use a spudger to disconnect the antenna by placing it under the cable and pulling it up.

Заключение

Congratulations!! To reassemble your device, follow these instructions in reverse order.

Macro Man

Участник c: 01/02/23

467 Репутация

0 комментариев