Введение

This guide will illustrate how to replace your Display Screen on the Samsung Chromebook 3 XE500C13-K05US . You will start by removing the bottom case and the battery.

  1. 31HCAFYNbkTlcrQT
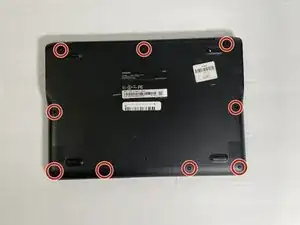
    • Place the laptop back cover facing up to show the screws.

    • Use a Phillips #00 screwdriver to remove the nine 4.6 mm bottom cover screws.

  2. RJl2lc1OAuCSTlug
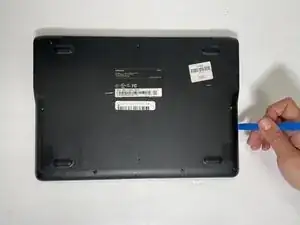
    • Use a nylon spudger or plastic opening tool to pop open the cover of the laptop.

    • You will hear a popping sound as the connectors disengage inside the case.

  3. ATtPSSxlcI6FIKnH
    ATtPSSxlcI6FIKnH
    SUdnvLbN5NyPIgig
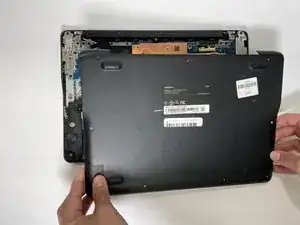
    • Remove the cover showing the inside of the laptop.

  4. SAVQvTdD6gcYX1uY
    SAVQvTdD6gcYX1uY
    PCGEOiUTBsrEQUPm
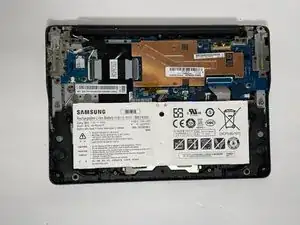
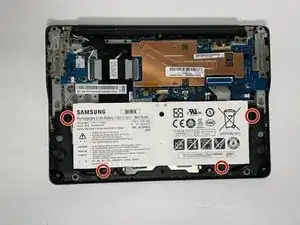
    • Unscrew and remove the four screws that secure the battery.

  5. t1RwyOnhmSkUhcWP
    t1RwyOnhmSkUhcWP
    A1mUxBRvOW4QjswI
    LwEVUbLCTyOBWRxA
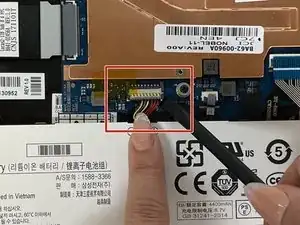
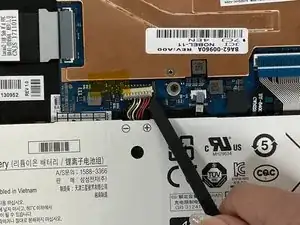
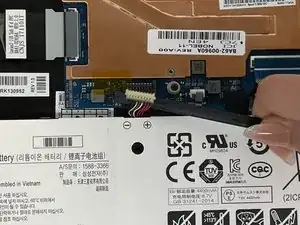
    • Use a spudger to pry underneath the battery cable connector, and gently lift the connector up.

  6. hm24Wes1IUmOOfcI
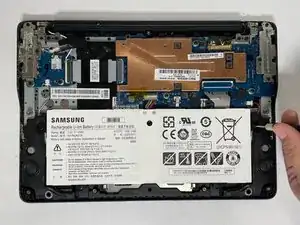
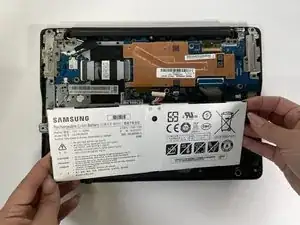
    • Lift the battery out of the case to remove it from the laptop.

  7. V4xVQIiVPEokocTI
    V4xVQIiVPEokocTI
    jn2RCytdCYgN4atO
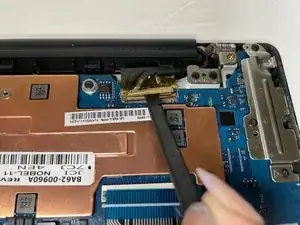
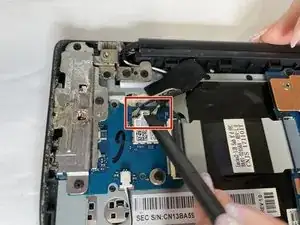
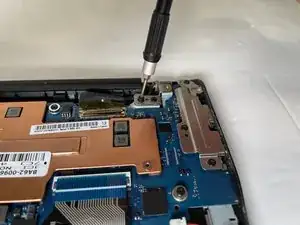
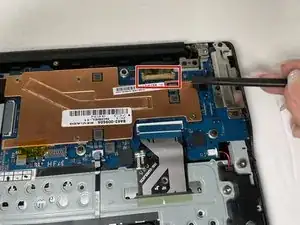
    • Use a spudger to lift the hinge that locks the gold colored display cable in place.

    • Pop the cable out and remove the hinge from the motherboard.

  8. MonPl6mWsX6fIHYY
    MonPl6mWsX6fIHYY
    QxuAVg35kjBkLmGO
    rgT3Pg6t5AZkTng6
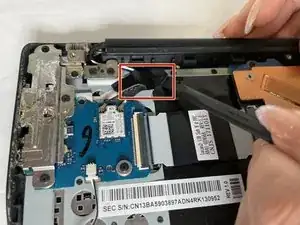
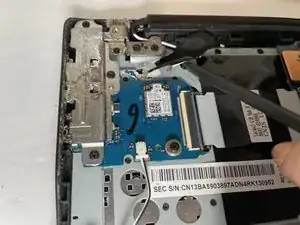
    • Using the ifixit spudger, raise the adhesive holding the wireless card antenna wires.

    • Raise the black and white antenna wires with the ifixit spudger.

  9. NU3AMdlyNDYvuHDt
    NU3AMdlyNDYvuHDt
    3xUyNAaoXlpy1Hpi
    ZDr1va5fFRRmWDRa
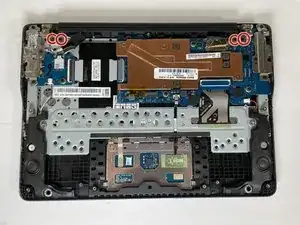
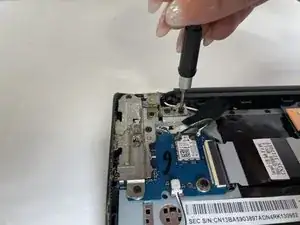
    • Remove the four 4.6mm screws from the display mounts.

  10. ANc1ZKMUbfDTWwlB
    ANc1ZKMUbfDTWwlB
    tJ4nvKHOa2bbXf3H
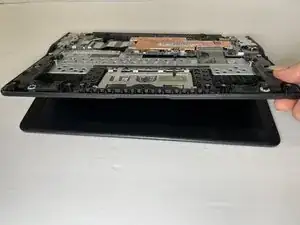
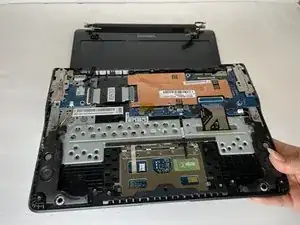
    • Once the hinge screws have been detached, open the laptop.

    • The bottom of the laptop will divide from the screen once you are able to open it a certain amount.

  11. qp6LRJfNGYLmbMnv
    qp6LRJfNGYLmbMnv
    2AIcBZmEF6mNAJUg
    1cZTYwdNHIbrvgsP
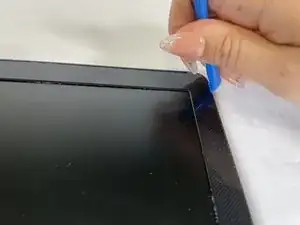
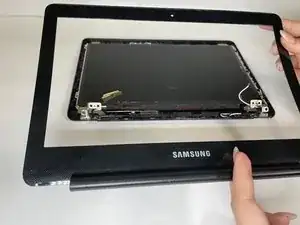
    • Using the ifixit opening tool to pry in between the bezel and screen.

    • You will hear some snapping as you open the bezel with the ifixit opening tool.

  12. Lygc3fv4xPQPEBcw
    Lygc3fv4xPQPEBcw
    koXsUhLE5PrfjFtl
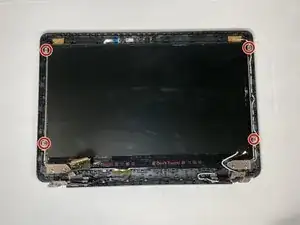
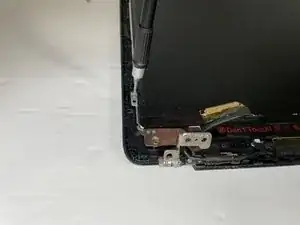
    • Remove the four 4.6mm screws from the display mounts.

  13. SD1anGmVUMi1UuI2
    SD1anGmVUMi1UuI2
    KUhQgppmXYwkBA1v
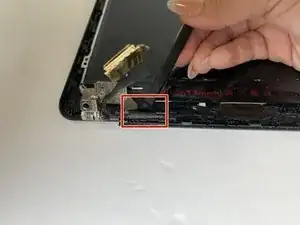
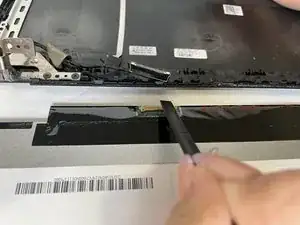
    • Using the spudger, raise the adhesive tap that is holding the display cable.

  14. 3SxCX1sPvZ1SYwKt
    3SxCX1sPvZ1SYwKt
    NYhRUNEjoUy2DeZO
    SkhXQk2JjgxPPkDQ
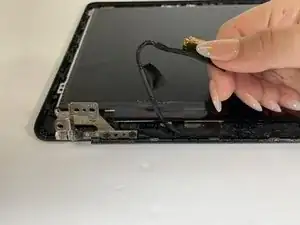
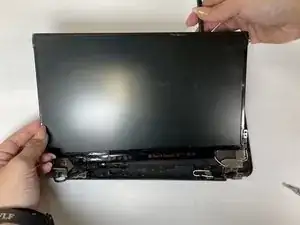
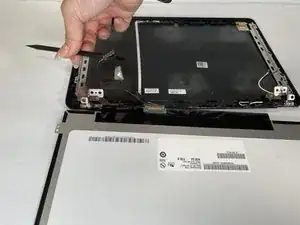
    • Slowly raise the panel up and fold it over to uncover the display cable on the backside of the display.

  15. poibb4woIDFuGUEG
    poibb4woIDFuGUEG
    6aUUpoOfFdyXsAx6
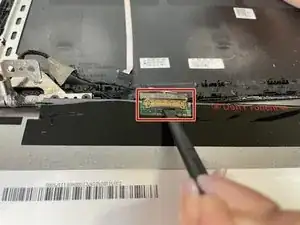
    • Using the ifixit spudger, raise the hinge that is locking the gold colored display cable in place.

    • Pull the cable away from far from you to slide it out the monitor.

    • Be tender around the display circuit board, it is labeled "Do not touch."

  16. Ktw4bbR2GTEMCphZ
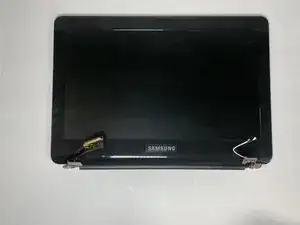
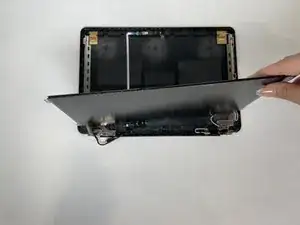
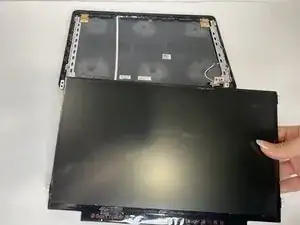
    • Once the display cable has been detached, raise the screen up and out of the case.

Заключение

To reassemble your device, follow these instructions in reverse order.
Yamaris Acosta

Участник c: 07/02/23

557 Репутация

0 комментариев