Введение

  1. VkJ3RBar2HBedGD2
    VkJ3RBar2HBedGD2
    A1YqfNOUd1ytigeu
    • Unscrew the screw and remove the cover.

  2. dbRHn3IYOxInBQFH
    dbRHn3IYOxInBQFH
    nA53VagpCJJIYxyq
    • Unscrew the two screws that are holding the lamp in place.

    • Pull the lamp out.

  3. W4uhYD1iQsETbogP
    W4uhYD1iQsETbogP
    tEjXGn5yfaIF2GLt
    DPkhBNb6MW6XCVHH
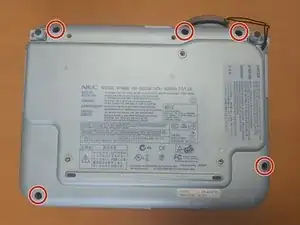
    • Remove 5 screws from the bottom.

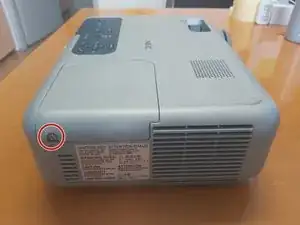
    • Remove 1 screw from the back.

    • Slowly lift the upper housing and disconnect the connector.

    • Do not lift the upper housing too quickly as it could damage the connector cable.

  4. lGkULqZvDdryJaL5
    lGkULqZvDdryJaL5
    Y4I2QEOfU33PskPX
    HHlCcnPqx6qtG4kd
    • After removing the upper housing. Turn the projector to see the fan.

    • Unscrew two screws from each side of the fan holder.

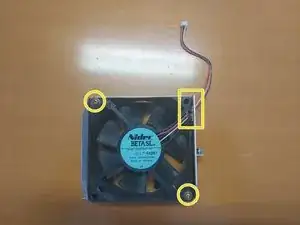
    • Remove the fan from holder by unscrewing the two screws.

    • Carefully take out the fan. Keep an eye on the wires that go through the holder.

Заключение

To reassemble your device, follow these instructions in reverse order.

Klemen Hodžić

Участник c: 01/11/20

634 Репутация

0 комментариев