Введение

For this guide you will need a new LCD screen. If you are using iFixit tools, you will need a PH000 head and a T5 star head.

  1. USbFEZQ3vDsrLhcS
    USbFEZQ3vDsrLhcS
    XR2KGmmlKTYPxhNR
    • Slide the battery cover to the right.

    • The hinge is on the left side of the cover which will allow the cover to stay attached.

  2. h3fuw3g4BUJKQipc
    h3fuw3g4BUJKQipc
    XxDGQ6tLkDH5VeU6
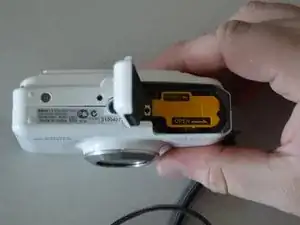
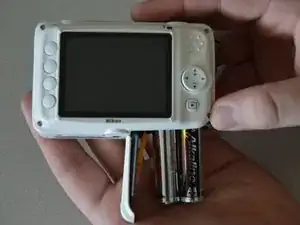
    • Slide the second cover (yellow) to the right (similar to the outer cover). This will allow the batteries to be exposed.

  3. 1EiHPjUIGwZFrSUo
    • Remove the batteries by gently tipping the camera.

  4. WTCYcYgTYXclTeBi
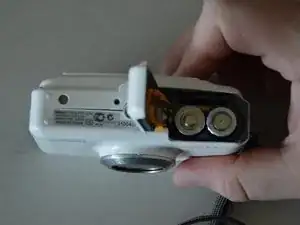
    • FIRST: remove the batteries.

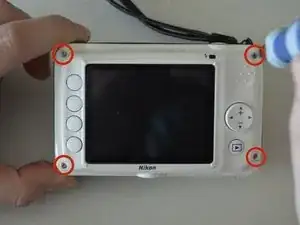
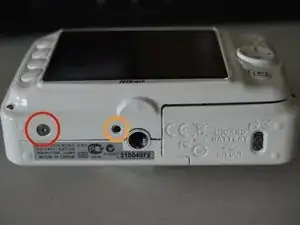
    • Unscrew the four screws around the corners of the camera. This can be done using the iFixit kit's T5 (star tip screwdriver)

  5. OrBTdXSPFVfBDwBy
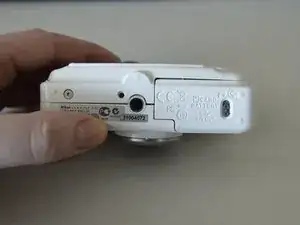
    • Unscrew the screw on the left (silver) first. It can be removed with the same tip (T5)

    • Change screwdriver tip to iFixit kit's PH000. This removes the screw on the right (black) It is a small Phillips head.

  6. ZsOypNGWMFe3EieN
    • Gently separate the back panel from the rest of the camera.

  7. gLkWCmlPdLeIdAZs
    • Remove screw connecting the top right of the screen to the mother board.

  8. a1qfktBCQZZEOmIN
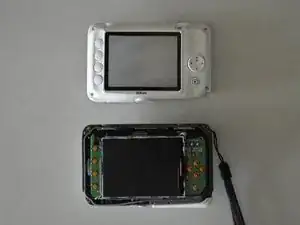
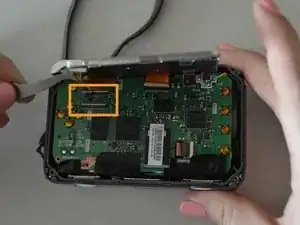
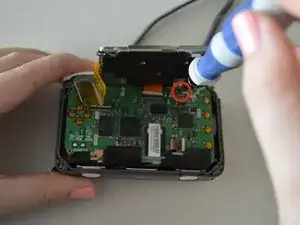
    • Spin the camera around and gently pull the screen towards you. This will allow easy access to components on the motherboard.

  9. 1IOmncdyGPBuLlIc
    1IOmncdyGPBuLlIc
    pjMD4ho3tOBBXHhM
    • Remove connected strip by flipping up the small off-white plastic strip with tweezers.

    • Gently pull out the strip from the motherboard.

  10. rlxyjQ1D1mkreEDi
    rlxyjQ1D1mkreEDi
    fsFJAvQBfRNAnDMw
    • Remove screw that is now in the top right corner. This will detach the screen entirely.

Заключение

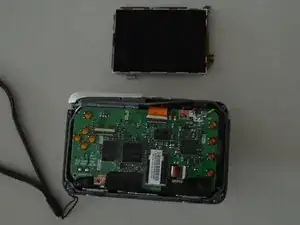
To reassemble your device, follow these instructions in reverse order.

Cassie Hamm

Участник c: 21/01/15

207 Репутация

0 комментариев