Введение

This guide walks through the replacement of the HP Chromebook 11 G3’s touchpad. It will require the use of tweezers, a Phillips head screwdriver, and a spudger.

  1. kTLULoYvMWqxSApe
    kTLULoYvMWqxSApe
    3SOKsBJG3UuYRUqV
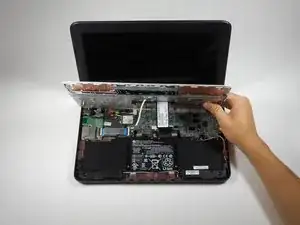
    • Flip the laptop upside down so that the lid lies flat on the table.

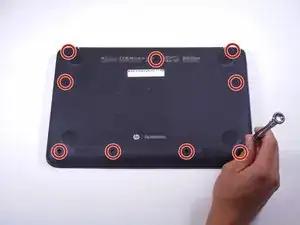
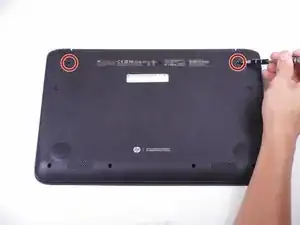
    • Remove the nine 6mm Phillips #00 screws that line the border.

  2. IRvkHp1aoqI5CyxA
    IRvkHp1aoqI5CyxA
    aKVyGerKYkgCL4vS
    • Remove the two rubber feet closest to the hinge using tweezers.

    • Remove the two 6mm Phillips #00 screws revealed under these rubber feet.

    • The rubber feet may tear while removal; preventing this can be difficult, but it won’t harm the laptop. If desired, replace these rubber feet during reassembly.

  3. LwgQFOUvVTgHQmfb
    • Flip the laptop so it is in the upright position.

    • Open the lid.

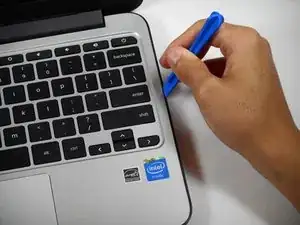
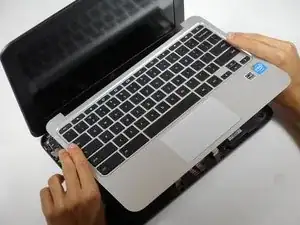
    • Unsnap the keyboard mount along the border of the laptop using a plastic opening tool.

    • This may require more force than expected. Hearing loud clicks as the plastic opening tool slides along the seam is normal.

  4. OyWy1LvdO12ZS4Ai
    OyWy1LvdO12ZS4Ai
    EETTmIjp6aXyiWw4
    w3kqSSplRh5kIxZi
    • Tilt the keyboard mount up.

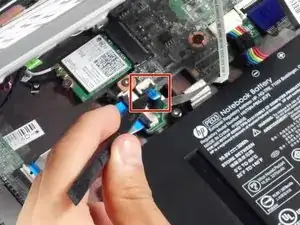
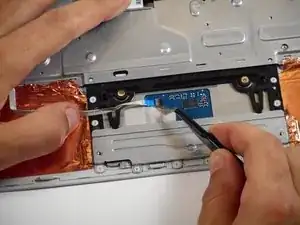
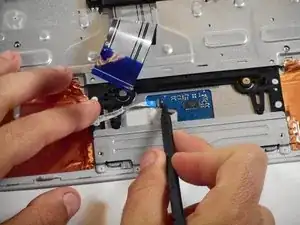
    • Use a spudger to flip up the two ZIF connector retaining flaps for the ribbon cables that connect the keyboard mount to the motherboard.

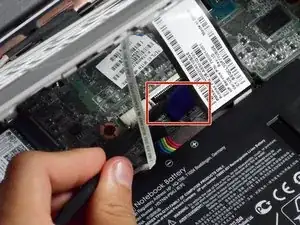
    • Gently remove both ribbon cables.

  5. LFTxR4CXnvnHvpou
    • Lift the keyboard mount out of the laptop.

  6. T14BrsQFGT3oaIcq
    T14BrsQFGT3oaIcq
    NWfoYDASLofbQCUS
    VTNOKZKRvlNpMCNX
    • Flip the keyboard mount upside down.

    • Use tweezers to lift the tape on the bottom of the touchpad to expose the connector.

    • With a spudger, push up the ZIF retaining flip.

    • Pull out the small ribbon cable.

  7. 5HAAGOUPvoSdABca
    5HAAGOUPvoSdABca
    qsgO6gPeouvWws1P
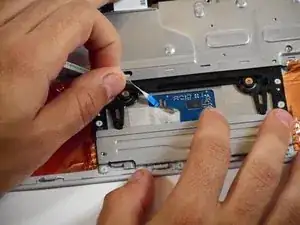
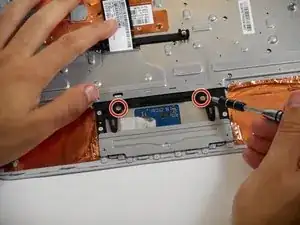
    • Remove the two Phillips #00 2mm screws that secure the touchpad to the black plastic housing.

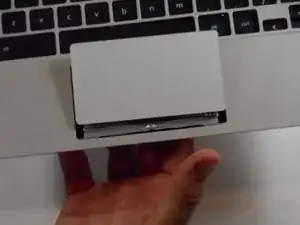
    • Flip the keyboard mount to the upright position.

    • From beneath, push the touchpad up through the top of the keyboard mount to remove it.

Заключение

To reassemble your device, follow these instructions in reverse order.

Rahul Goyal

Участник c: 26/04/17

1401 Репутация

0 комментариев