Введение

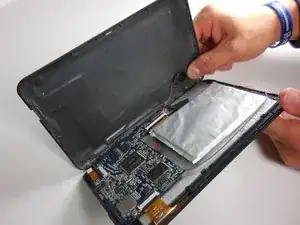
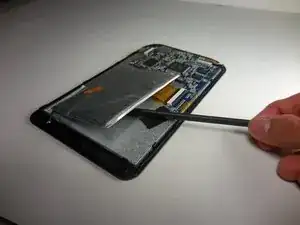
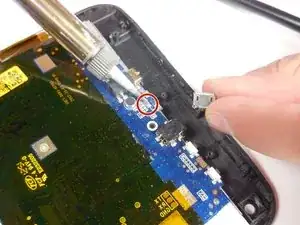
The charger port is located on the motherboard (the blue L-shaped piece) at the bottom of the device. In order to replace the port, a soldering kit is needed. Be sure you have all the necessary tools and safety equipment on hand before starting.

A guide to soldering can be found on iFixit's website here.

  1. HVqX2Q5nmUjrcBEa
    • Remove the two 2cm screws on the bottom using the PH0 Phillips head screw driver.

  2. Qfh5iVcq6QbLdQEI
    Qfh5iVcq6QbLdQEI
    AfEUSfn36ugSyy2U
    • Pry open back piece with plastic spudger.

    • Remove the back piece of the device.

    • The back panel may be difficult to pry off, use gentle force.

  3. QHp1GtnImOcguQRs
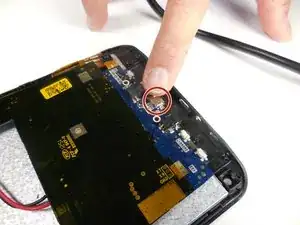
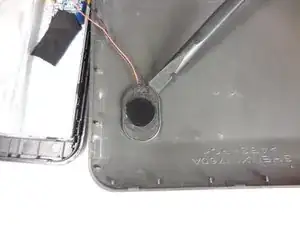
    • Disconnect speaker (which is attached by black and red wires) from back piece using plastic spudger.

  4. LTCOnSeHHD2iRykB
    • Gently pry the battery off of the device with the plastic spudger.

    • There is a large amount of glue holding the battery to the device.

    • Do not puncture the battery with the plastic spudger.

  5. oCjiGSDoGJUyXSiu
    • The charger port is located on the underside of the motherboard (as pictured).

  6. 1qK5VNYrxmkpxMFZ
    • Remove the charger port by using tweezers and gently pulling.

  7. hOFgyZ3tHYQLPgou
    • Solder and place new charger port.

Заключение

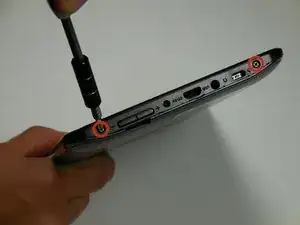
To reassemble your device, snap back piece on to the front piece and screw in both 2cm screws at the bottom.

Michael

Участник c: 11/03/15

568 Репутация

0 комментариев