
Введение
-
-
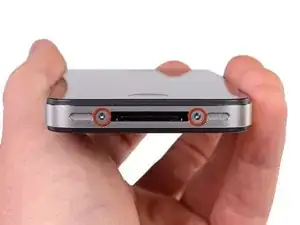
Задняя панель вашего iPhone может быть прикручена #000 Phillips(крестовыми) винтами или Apple 5-ти конечными "Pentalob" винтами(второе изображение). Проверьте какие винты использованы у вас и убедитесь что у вас есть необходимая отвёртка для их удаления.
-
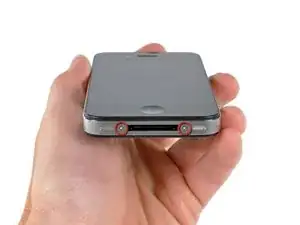
Удалите два 3.6 мм Pentalob или Phillips #000 винты около разъёма.
-
5-ти конечная отвёртка используется только один раз.
-
-
-
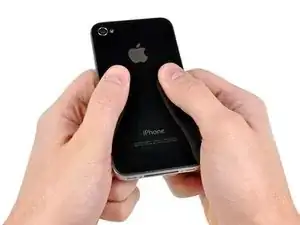
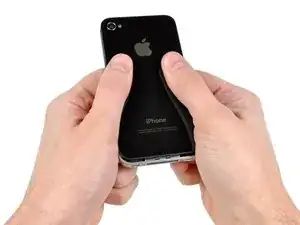
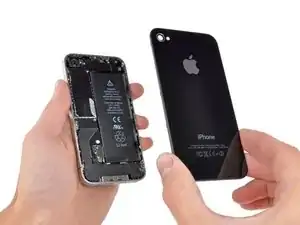
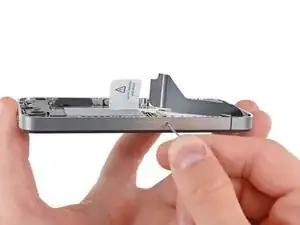
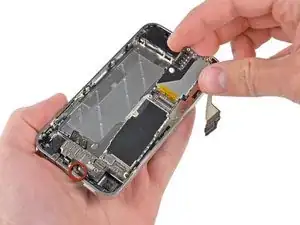
Зажмите заднюю панель между пальцами и потяните её от устройства. Также это можно сделать с помощью маленькой присоски.
-
-
-
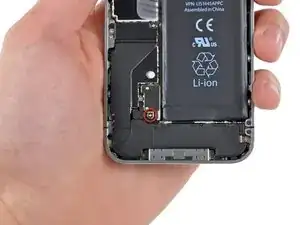
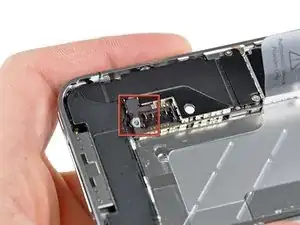
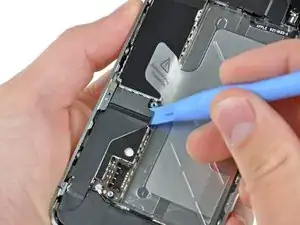
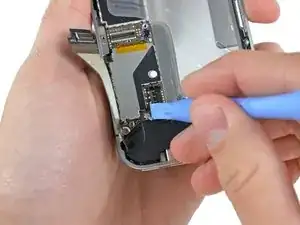
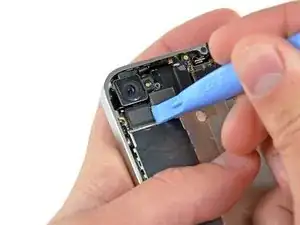
Используйте пластиковый инструмент для отключения шлейфа аккумулятора от коннектора.
-
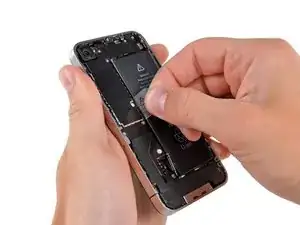
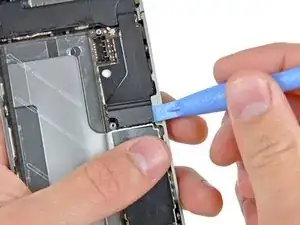
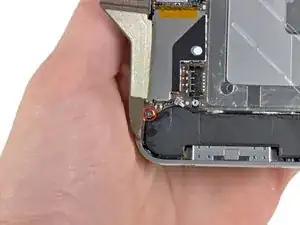
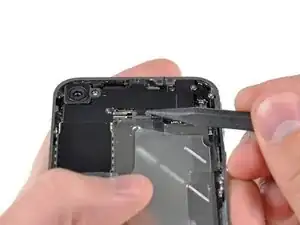
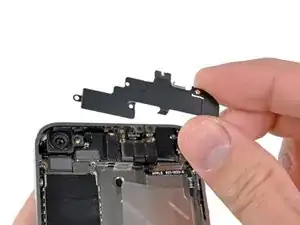
Удалите фиксатор антенны.
-
-
-
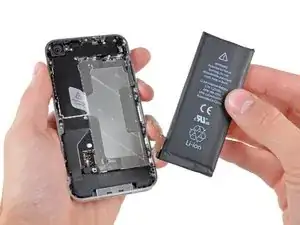
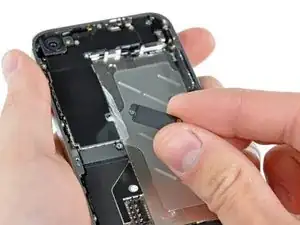
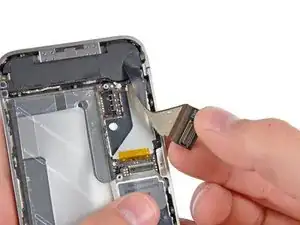
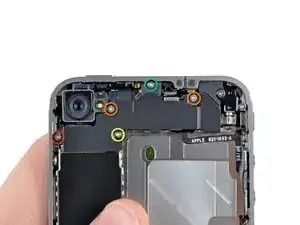
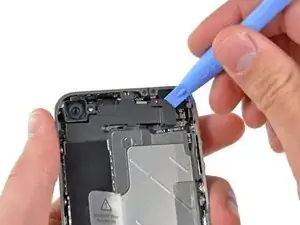
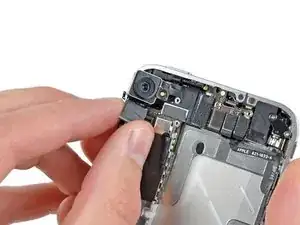
Потяните за пластиковый язычок чтобы отклеить аккумулятор.
-
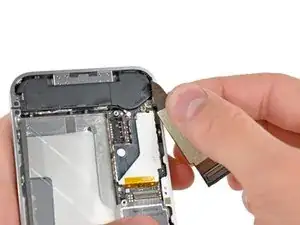
Remove the contact clip from the iPhone.
-
-
-
Используйте инструмент для извлечения SIM-карты или скрепку для бумаги для того чтобы открыть лоток.
-
Удалите SIM-карту и лоток.
-
-
-
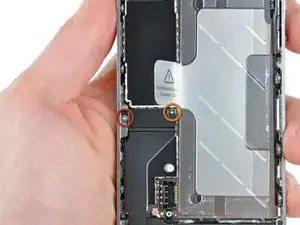
Открутите 2 винта:
-
Один 1,2 мм Phillips(крестовой).
-
Один 1,6 мм Phillips(крестовой).
-
Уберите стальную крышку шлейфа разъёма док-станции.
-
-
-
С помощью пластиковой лопатки отщёлкните с обоих сторон шлейф разъёма док-станции от материнской платы.
-
-
-
Выкрути 5 винтов, крепящих Wi-Fi антенну к материнской плате:
-
Один 2,3 мм Phillips(крестовой
-
Два 1,6 мм Phillips(крестовой)
-
Один 1,4 мм Phillips(крестовой)
-
Один 4,8 мм Phillips(крестовой)
-
-
-
С помощью пластиковой лопатки аккуратно поднимите Wi-Fi антенну за верхнюю грань.
-
С помощью щупа потяните защёлку Wi-Fi антенны, крепящую её к корпусу.
-
Снимите Wi-Fi антенну. Убедитесь, что не потеряли металлическую защёлку, которая была под 4.8 мм винтом, на верхней части крышки
-
-
-
С помощью пластиковой лопатки аккуратно отщёлкните разъём задней камеры от материнской платы.
-
Вытащите заднюю камеру.
-
-
-
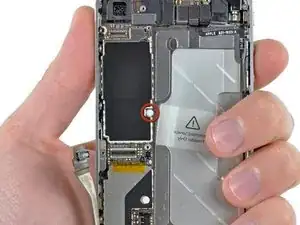
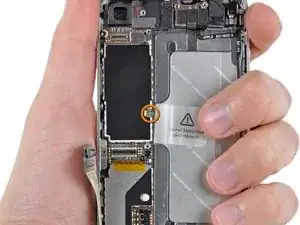
Отклейте маленькую круглую белую наклейку(наклейка гарантии и индикатор воды) закрывающую винт рядом с аккумулятором.
-
Выкрутите 2,4 мм Phillips(крестовой) винт, который был скрыт под наклейкой.
-
-
-
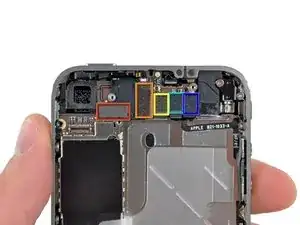
С помощью пластиковой лопатки отключите шлейфы от разъёмов на материнской плате:
-
Шлейф сенсора(поддевать снизу)
-
Шлейф дисплея(поддевать снизу)
-
Шлейф наушников и кнопок регулировки громкости(поддевать сверху)
-
Шлейф верхнего микрофона/кнопки питания(поддевать сверху)
-
Шлейф фронтальной камеры(поддевать сверху)
-
-
-
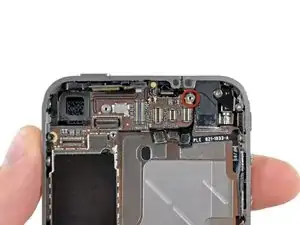
С помощью маленькой плоской отвертки выкрутите 4,8 мм стойку рядом с разъемом наушников.
-
Убедись, что угол материнской платы установлен под обведенную стойку, иначе винты могут не закрутиться.
-
Во время сборки, убедитесь что резиновая прокладка, крепящаяся к верхней части материнской платы, на месте. Отсутствие этой прокладки может повлечь повреждение шлейфов, завёрнутых вокруг платы.
-
-
-
Аккуратно извлеките материнскую плату из корпуса, не забывая про шлейфы, за которые можно зацепиться.
-
При сборке будьте осторожны - не зажмите шлейф нижней антенны под платой.
-


To reassemble your device, follow these instructions in reverse order.

15 комментариев
I did a screenreplacement but i just can't fit the logicboard in to place :(. It doesn't slide down in to it's position.
I did a thorough surgery of mine today. Ppl couldn't hear me at all, so I had to get to the logic board.it was not challenging at all. One has to be careful with the antenna area so as not to apply to much force thereby damaging it. However,if u couldn't clip it back,just use a paper tape to hold it down b4 placing the battery plate on it. I recoupled the phone and everything work excellently. Ppl can hear me clearly now
akinlolu -
using something like the 18-compartment tray will GREATLY help with this one; there are over a dozen groups of parts. For re-assembly having a digital calipers to measure the 2.4 vs the 2.6mm screws also helps greatly.
awr -
My method for hardware management during delicate phone surgery is to take and print out on 8.5"x11' paper, one or more pictures of the open phone in various stages of disassembly, and then tape the screws to the appropriate spots on the pictures. Also write numbers on the pictures next the screws to indicate the order in which you removed them.
lens42 -
I use a plastic egg tray, I drop all the screws and small parts (like the camera) for each step into the same egg indentation. You can see that the screws are different lengths, so I don't put one screw into it's own spot. I used 5 egg indentations to replace my screen.
Mangled Jargon -
I did a successful surgery on my iPhone, be warned this is not for the faint of heart!
I've done iPod screen replacements, battery replacements, this is by far much more difficult and intricate.
Great write up! Thanks a million.
Jaysen Strange -
I've changed some iPod screens as well and that has been the least pleasant experience so far. Glue and the main connector that has to be unwrapped and connected from the rear where you have no feel or control where it belongs.
iPhone repair is complex, but doable and has very few "traps".
mcbohdo -
Couldn't even get both screws out of the bottom of the case. One was easy and other refuses to budge. Screws so small I can't see if it is turning or screw driver is properly seated. Sad I too have done screen replacements on other phones. Don't know any secrets to get the screw out
ckracht -
I also have a problem with seeing what is happening with some of those tiny little screws and parts. For other projects that I do, I use an Opti-Visor. It slips over your head and provides 10x magnification. ( You can find them on Amazon).
Yeah, it adds cost to the project and you would have to wait for delivery, but it sure makes a world of difference in seeing what you are working with / on.
jhow -
On an early iPhone 4 I found that the #000 Phillips bit included in the 54 Bit Driver Kit didn't actually fit the screws. However the JIS #000 also in the kit did fit quite well. This is due to the JIS bits "thinner" design to prevent camming out of the slot. Otherwise everything went well. Looking forward to replacing the battery in my other phone that has the pentalobe screws. Glad I got the 54 Bit kit!
etler -
Use a vacuum duster and a sharp tool to pry out the dust, this can increase the volume insanely!
Dpairs -
What does the park that is gold and next to the 4.8mm screw for the antenna? Looks like I am missing that part and almost positive that is why I can't pick up or connect to any wifi signals. I have the screw and the antenna from another phone that is working and tried it on the broken phone and still doesn't work. Only thing different is that gold metal piece to the left of that 4.8 mm screw. Can I buy that part? how do I attach it?
Jay Pennington -
great instructions did it the first time
Mr J -
For organisation of the parts and for a much easier process of rebuilding i use a big magnetic flat surface with a grid drawn on it. Then I use a dry erase marker to make any notes I need and to number the parts in order as i disassemble . Believe me it saves a lot of time and hassle especially if you drop one of those tiny screws good luck finding it but when your working over the magnet and drop a screw its going to be right where it fell. At first I tried the piece of paper to keep organised but all it takes is one small slip and you move the paper too quick and your left with a jumbled bunch of screws and parts and a painstaking task of putting it all back correctly, aka a big waist of time and effort.
case-yg -
I found it very useful to use a magnet sheet when doing these repairs. I use electrical tape or a sharpie to make a grid, and place each micro screw in a separate box on the grid.
I work directly over the magnet sheet, so that if something drops I have a better chance at not losing it.
If you do lose a screw, go over the work area with a fridge magnet. It will pick it up if it hasn’t popped too far away.
Megan Telliano -