Введение
-
-
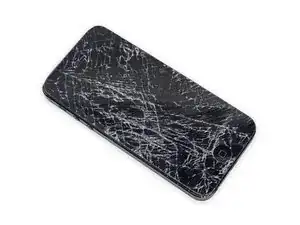
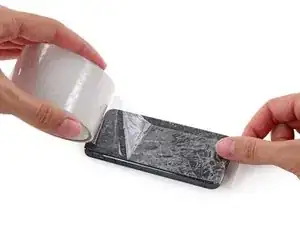
Если стекло дисплея разбито, то в процессе ремонта важно предотвратить его дальнейшее разрушение (которое, кстати, может повлечь за собой серьёзные травмы). Заклейте стекло клейкой лентой.
-
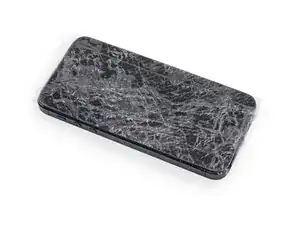
Наложите столько слоёв прозрачной ленты, сколько потребуется. Дисплей должен быть заклеен полностью.
-
-
-
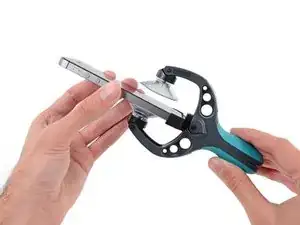
Откройте «челюсти» с присосками, сведя ручки iSclack вместе.
-
Поместите iPhone между присосок, вложив его в пластиковый ограничитель.
-
Верхняя присоска должна оказаться чуть выше кнопки Home.
-
Сведите присоски вместе, разведя ручки. Крепко прижмите присоски к передней и задней панелям iPhone.
-
-
-
Удерживая iPhone, вновь сведите ручки iSclack вместе. Передняя панель выскочит из корпуса.
-
Угол раскрытия iSclack специально подобран , чтобы корпус и панель можно было отсоединить друг от друга, не повредив шлейф кнопки Home.
-
Отсоедините детали от присосок.
-
Сразу переходите к шагу 7.
-
-
-
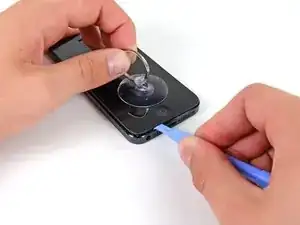
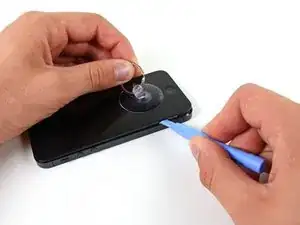
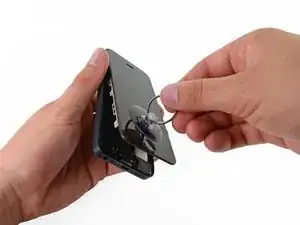
Удерживая iPhone одной рукой, потяните вверх присоску, чтобы слегка отделить переднюю панель от задней части корпуса.
-
Пластиковым инструментом для открывания начните аккуратно оттягивать заднюю часть вниз, от экрана, одновременно вытягивая присоску вверх.
-
-
-
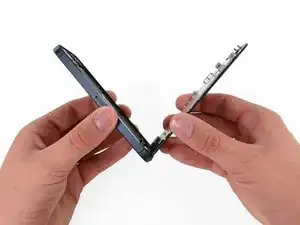
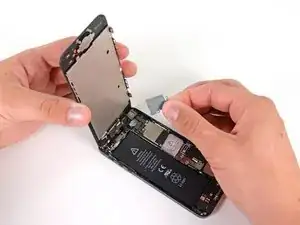
Когда все защёлки снизу, слева и справа отсоединены, начните отделять нижнюю часть дисплейного модуля от нижней части корпуса телефона.
-
Осторожно расположите модуль примерно под углом 90 градусов к корпусу.
-
-
-
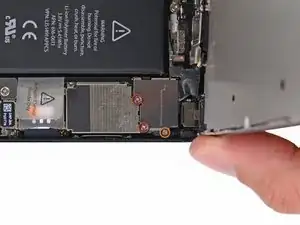
Удалите следующие винты, крепящие шлейф модуля к плате:
-
Два винта 1,2 мм Phillips (крестовые)
-
Один винт 1,6 мм Phillips (крестовой)
-
-
-
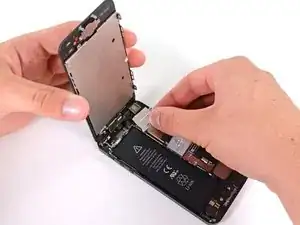
Используйте пластиковый инструмент, чтобы отключить три шлейфа передней панели:
-
Шлейф фронтальной камеры и сенсора
-
Шлейф дисплея
-
Шлейф цифрового преобразователя
-
-
-
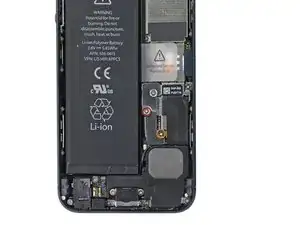
Удалите два винта, фиксирующих металлический держатель коннектора батареи на материнской плате:
-
Один крестовой 1,8 мм (Philips)
-
Один крестовой 1,6 мм (Philips)
-
-
-
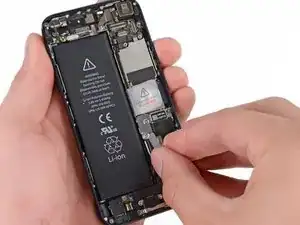
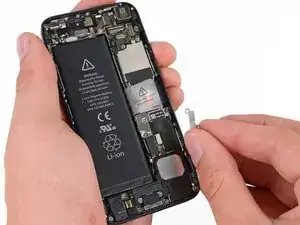
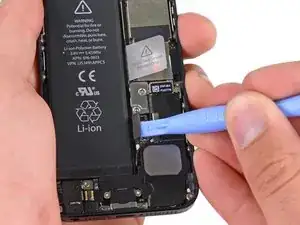
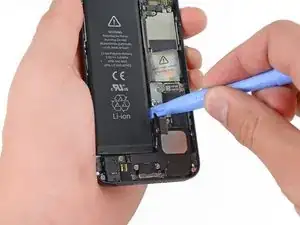
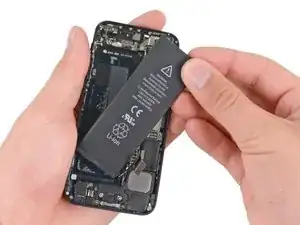
Используя пластиковую лопатку, аккуратно приподнимите коннектор батареи от его разъёма на материнской плате.
-
Будьте очень осторожны, поднимайте только коннектор батареи, но не разъём. Если вы поднимете разъём материнской платы, это повлечёт за собой поломку.
-
-
-
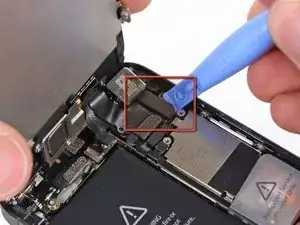
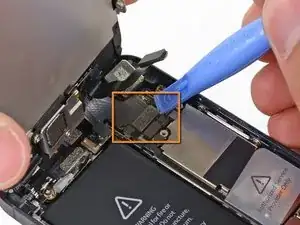
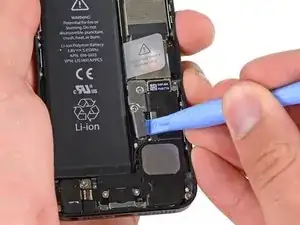
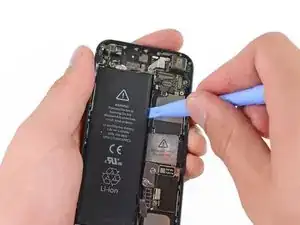
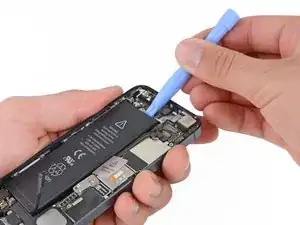
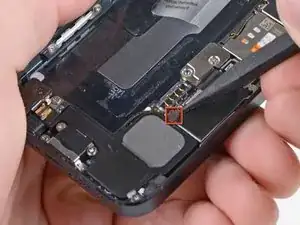
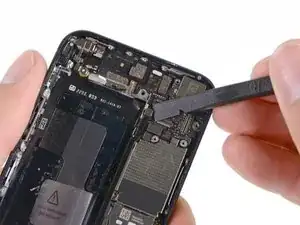
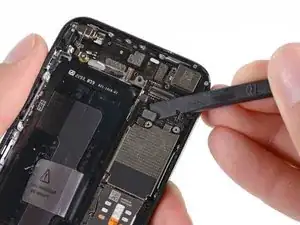
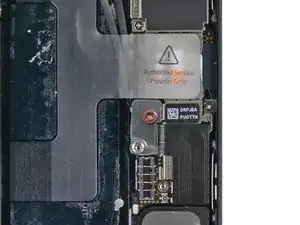
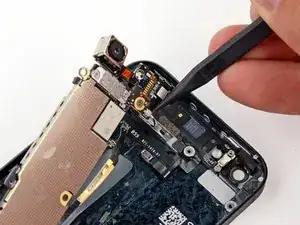
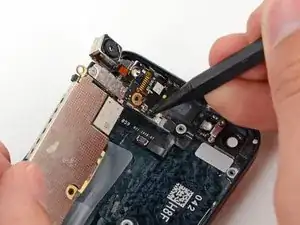
Используйте диэлектрическую лопатку, чтобы подцепить коннектор сотовой антенны от материнской платы (рядом с динамиком).
-
-
-
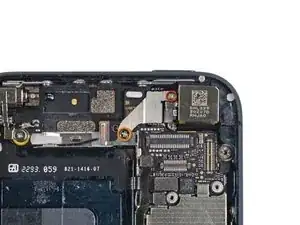
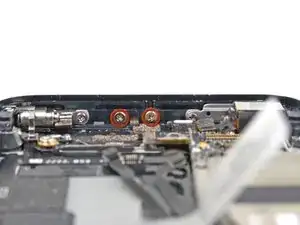
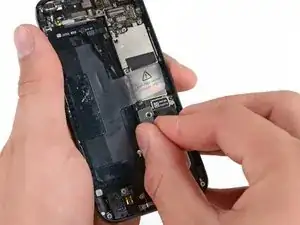
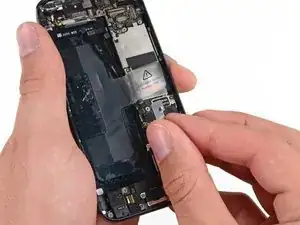
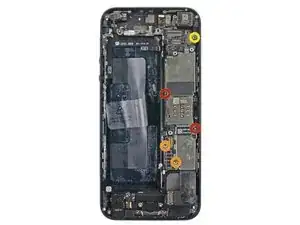
Удалите два винта, фиксирующих крепёж верхней части материнской платы на задней крышке:
-
Один крестовой 1,5 мм (Phillips)
-
Один крестовой 2,3 мм (Phillips)
-
-
-
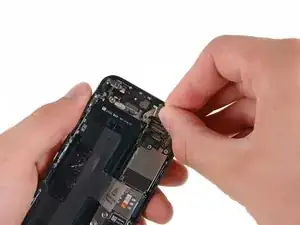
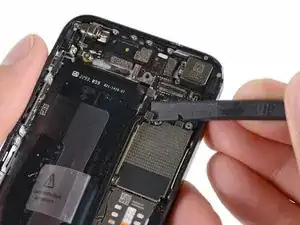
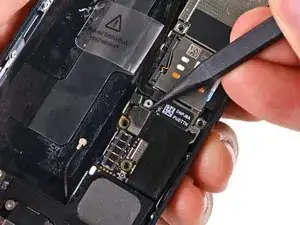
Используйте диэлектрическую лопатку для отключения трёх шлейфов от материнской платы:
-
Верхний соединительный шлейф
-
Шлейф клавиатуры
-
Нижний соединительный шлейф
-
-
-
С помощью диэлектрической лопатки отключите коннектор шлейфа разъёма Lightning от его разъёма на материнской плате.
-
Аккуратно отведите шлейф от материнской платы.
-
-
-
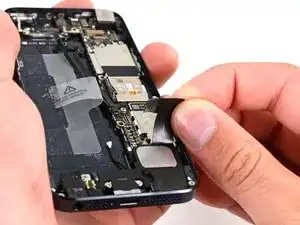
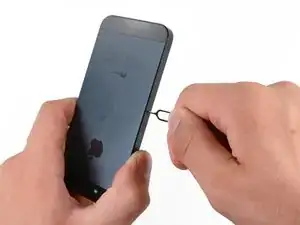
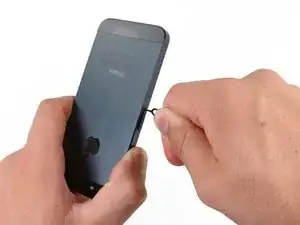
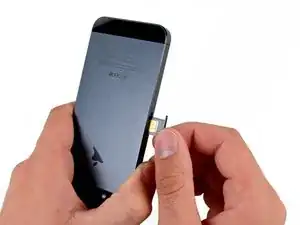
Извлеките лоток SIM-карты с помощью скрепки или специального приспособления.
-
Remove the SIM card tray from the iPhone.
-
-
-
Удалите винты, крепящие материнскую плату к корпусу:
-
Два крестовых 2,3 мм (Phillips)
-
Три винта 2,7 мм
-
One non-magnetic 2.7 mm standoff screw
-
-
-
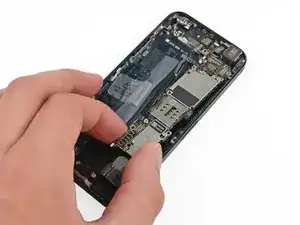
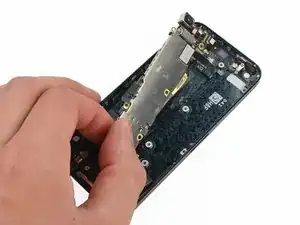
Поверните материнскую плату в направлении батарейного отсека.
-
Если вспышка осталась на материнской плате - снимите её с помощью пинцета и поставьте на место.
-
Note: when reassembling your device, be sure that the lower interconnect cable is not tucked underneath the logic board.
-
-
-
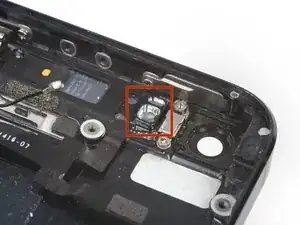
Острым концом диэлектрической лопатки аккуратно отключите коннектор антенны Wi-Fi от нижней части материнской платы.
-


Следуйте этим инструкциям в обратном порядке, чтобы собрать устройство.
Один комментарий
Thank you! I successfully swapped boards between two frames
Having completed this repair using the rear camera part from Ifixit I have to comment that the camera is noticeably lower quality. Its not huge - You don't notice it looking at the photos scaled down to fit but viewing one for one there is significant detail lost. My staff member has an Iphone 5 bough at exactly the same time as mine so I was able to take a photo side by side on his and mine after my repair and when you view 1 for 1 pixel in product boxes on mine the text was just a colored blur where on his although you couldn't read the text it was more obviously text. Overall though its still better than having a camera that wouldn't focus at all and being that Apple seem to refuse to supply genuine spare parts (Which there has to be a low against??? - Imagine if a car manufacturer did that) its still good buying one from someone who gives good support. At the end of the day its a phone camera not an SLR and its still better than the older Iphone 4 camera.
matt -
The majority of product manufacturers are not required to provide parts, and apple will fix items under the various warranties it offers. Car manufacturers on the other hand are required to make parts available by law. It is part of the regulation of their industry. They get a lot of protection for their business model, but have some obligations too. It's why the EV1 was pulled, they didn't want to have to make the parts, and why there are so many Delorian parts.
William Leeper -
This is a great guide. However, I'm having a hard time popping the screen back into place. Everything works but I'm afraid of putting too much pressure least I crack it again. Any advice?
amciotola -
To avoid broken screens during reassembling:
Put the hooks of the screen in the right place in the housing, then close it loose, don't press it. Turn your phone upside down with the screen on a very flat surface (e.g. table). Now press the housing on the screen -> no more risk for braking the screen because of inhomogeneous force applied on the glass!
mondbewohner -
I hope folks read this comment before proceeding to attempt a Sleep/Wake button repair on the iPhone 5! Apple has an iPhone 5 Sleep/Wake button replacement program, free, for iPhone 5 devices manufactured through March 2013. See program details at https://www.apple.com/support/iphone5-sl.... Don't do this yourself if you don't need to. It's a difficult repair.
Mark Luscher -
I was willing to add the following important remark on top of this guide but, strangely, it has been refused! Here it is:
---
*Check if your Iphone 5 is eligible to the Apple special program for a free battery replacement (devices sold between September 2012 and January 2013, within a limited serial number range).
* If not, watch the video and use this guide [video|https://www.youtube.com/watch?v=6ogE8USs...]
---
And thus, as my Iphone 5 was eligible, I went to the Apple store of Le Louvre in Paris and the battery has been changed for free instead of 65 euros. Thanks to Mark!
revher -
Hi every one i drop my iphone5s 16gb
I replace 10!new screen but cant back to live i see on the "logic board" where u conect the screen i se damage HOW CANT FIX THAT WHITOUT LOST MA DATA ??? Thaks for anny hellp!!!!!
aliroberto01 -
Steps 12-15 seem to be not necessary for battery replacement. They are not required to remove and replace the battery and they at least DOUBLE the amount of work. Most of the time spent on this process involved working with those tiny screws and maneuvering them in place and screwing them down. Steps 12-15 are three of the five screws that you work with inside.
Also, there should be a note at the beginning of Step 2 that if you bought the iFixit kit that you should go directly to Step 6.
Bob Hatcher -
please wear safety helmet too, integral helmet and cover mouth with an N95 facemask underneath, just in case the battery punctures, explodes, you knock your head back to the wall and slam it back forward hitting the screw in your eye and and inhaling toxic fumes! can never be too careful ;-)
ibisiki -